Grog Splices
# Grog Splices
Grog splices are a new method of connecting split highlines, but have already gained fans for being the lowest volume split connector. They offer numerous advantages over existing highlines split connections, and are the first connector to facilitate semi-permanent connections. This method has been in testing for a year, and this article aims to be exhaustive with everything currently known about grogs and split highlines.
Semi-permanent connections are weird based on the current paradigm of soft shackle and quicklink connections. They might challenge some existing notions about highline splits, but their benefits are worth a shift in mindset. So what is a grog, how do you make one, how strong are they, and where should I use them? Keep reading to learn all there is to know about grog splices.
# What is a Grog?
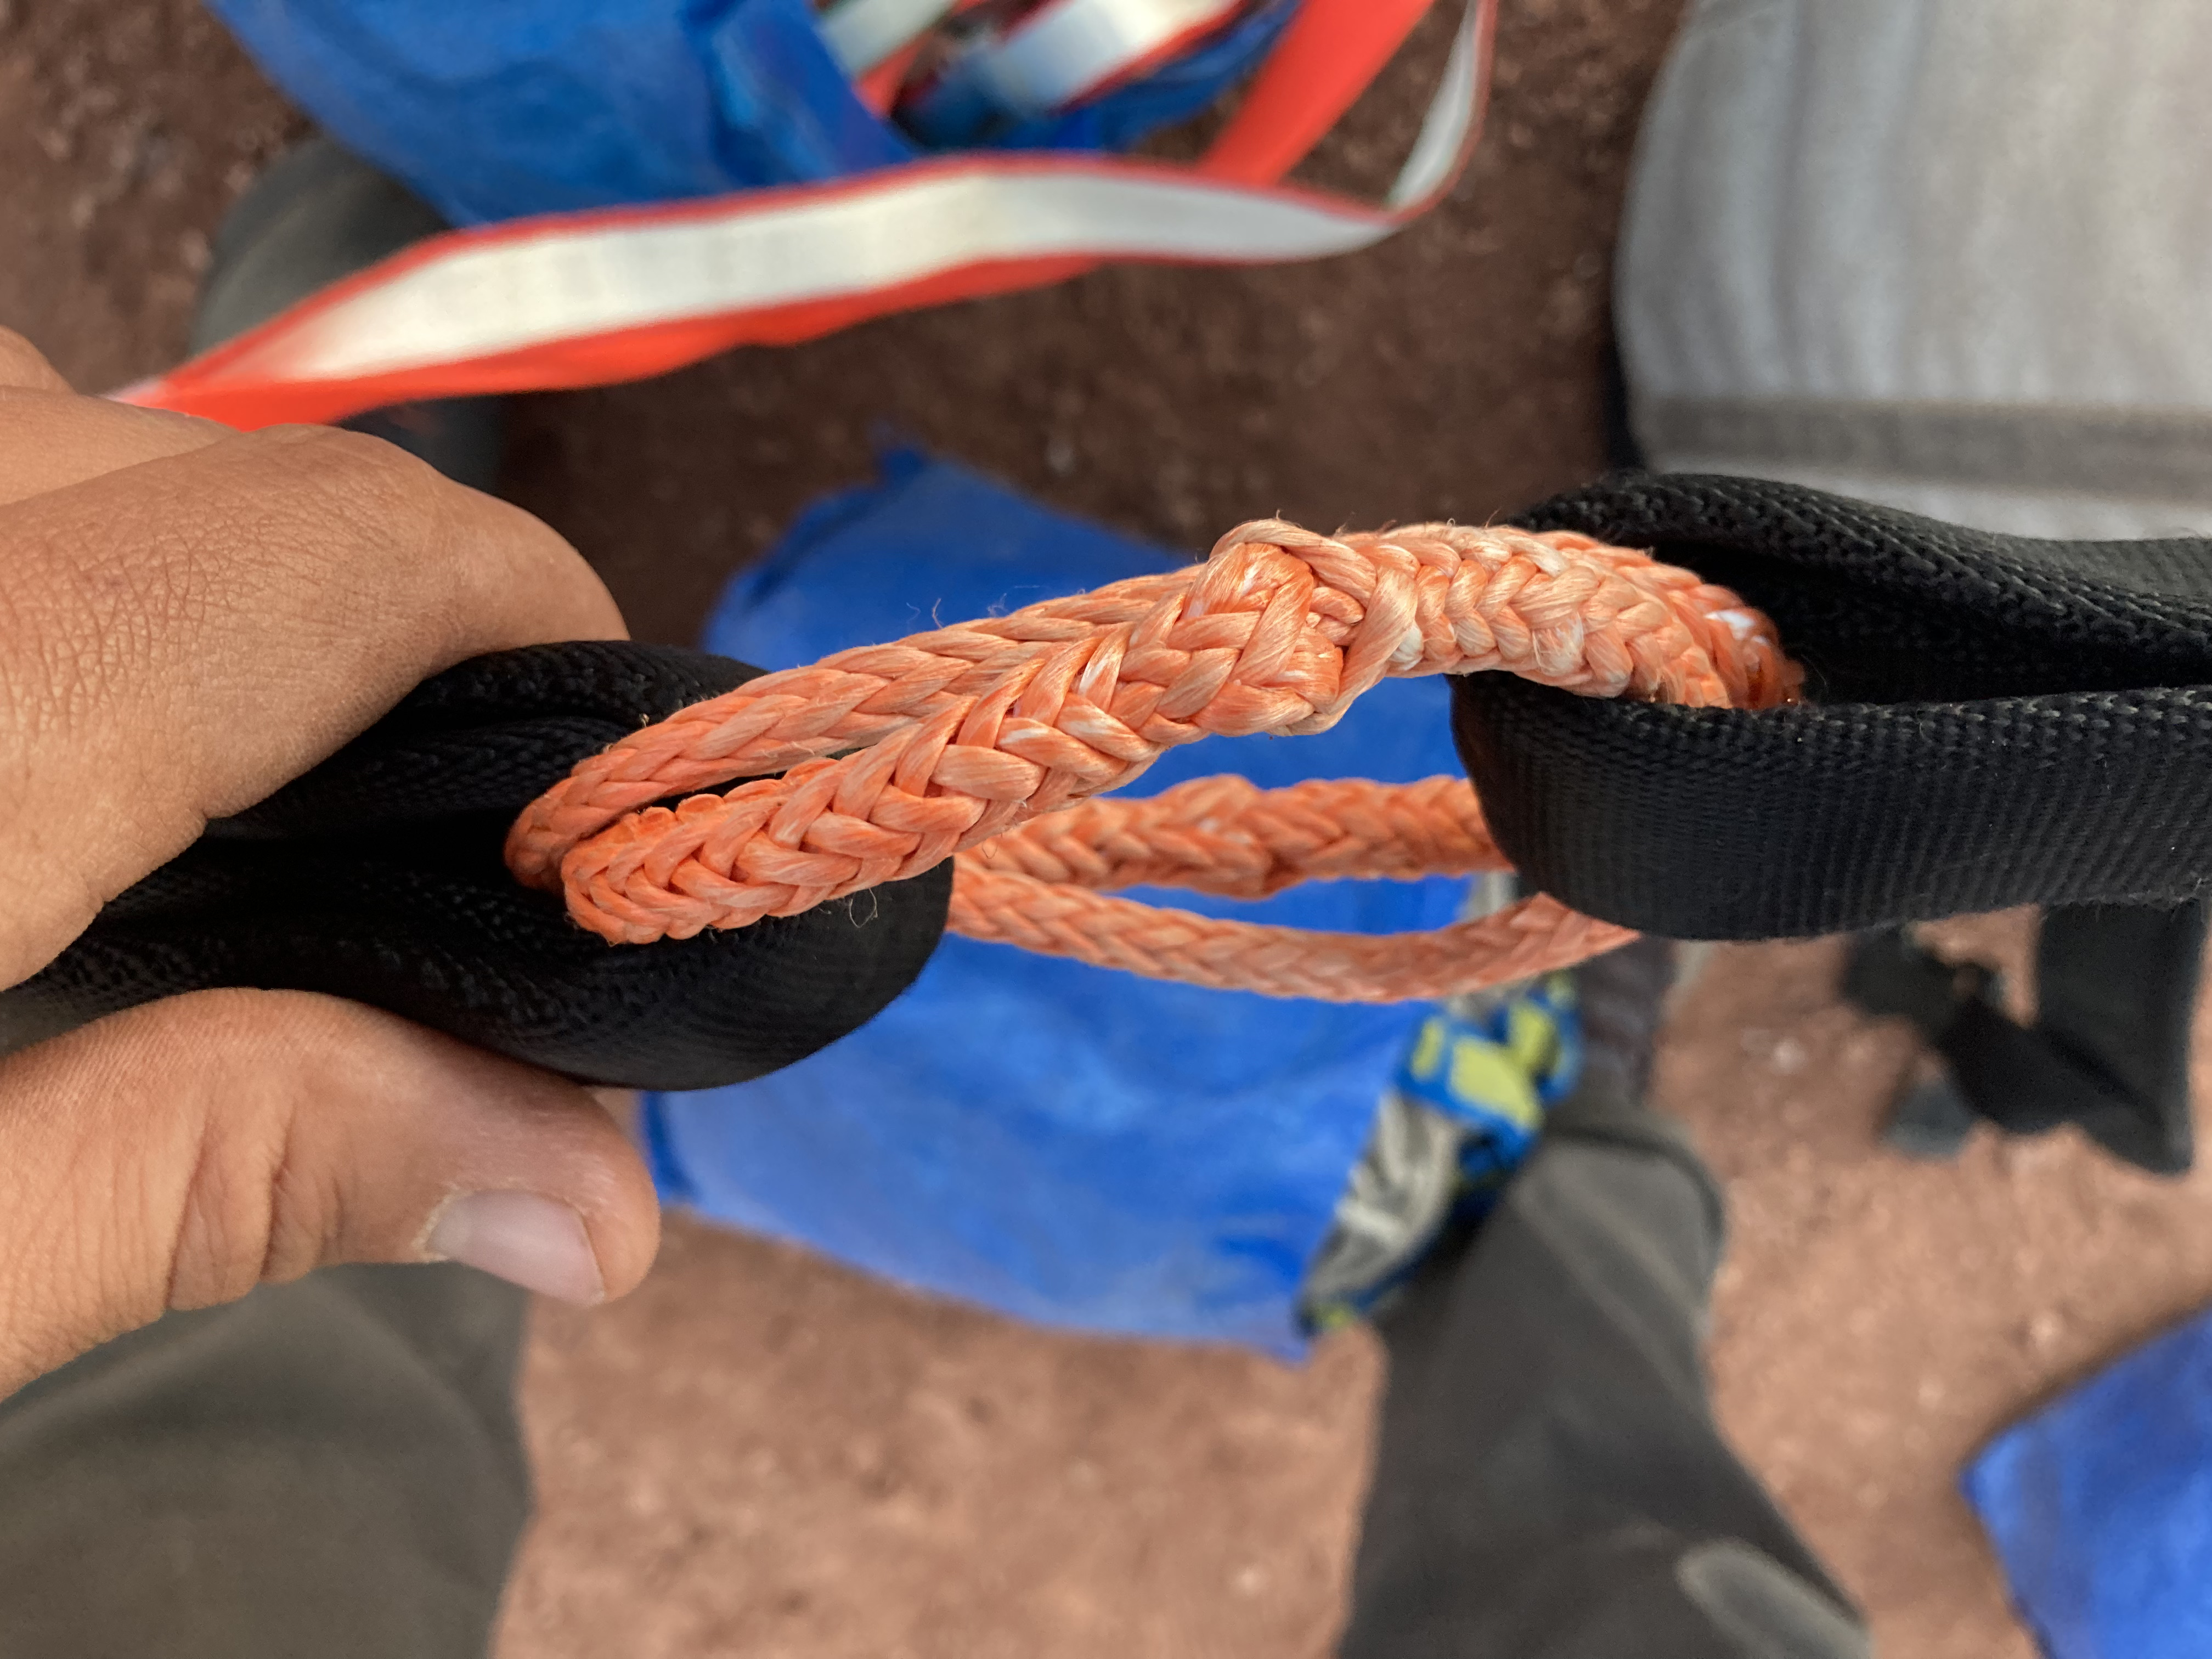
A grog is a method of splicing a continuous loop of braided material that makes use of a brummel splice, but buries each tail back into the working strand on the side it came from. Here is the animated knots page for the grog sling, which has good pictures and some discussion of grogs (some of the discussion does not match the testing found below, or the first hand experience I have of using grogs while slacklining).
Our particular interest in grogs is as a connection method in highline splits, replacing soft shackles and quicklinks. If you’re just interested in how they can be an improvement over other connection options, skip to Benefits of the Grog below. But if you’d like a deeper dive into how and why the idea for using them came about, keep reading here.
# Origins
To my knowledge, grogs were first used in slacklining as the manufacturer recommended way of re-splicing the Souz Snatch, which was originally shipped with a weak splice that had a tendency of fully unraveling during normal use.
But the idea of using them in split connections first appeared in discussions between me and Owen Roll. I had been making a lot of variations of continuous loops in dyneema, and showed Owen some of the variations I had tried splicing. I had deemed them useless for splits because they don’t open like a soft shackle, but Owen convinced me of the benefits. Fairly quickly we seemed to settle on the grog as being the best continuous loop method for the job. Sirio Zao made a post on SlackChat asking about use of a grog in splits in combination with a soft shackle before Owen and I shared our idea publicly, and no one seemed to have used them previously or been convinced to try them.
The first use of them in a split was by Jerry Miszewski on a 200m permarig in the fall of 2021, after I brought the idea to him and we break tested some I had made. I rigged lines with them at the Halloween Fruitbowl Gathering and GGBY, also in the fall of 2021, along with some other rigs. Jerry’s line had 5mm grogs with 6" buries and lock stitching on one side. My lines used 5mm grogs with 3-4" buries and no lock stitching, and even rigged for days at a time at a festival saw no problems with the buries coming undone. The grogs were exceptionally easy to walk over, easy to splice and unsplice, and apparently safe enough. But I waited until now to share the grog in order to make sure I tested them fully before advocating them to the general public.
# Semi-Permanent Split Connections
One of the main benefits of split connections is the ability to connect and disconnect separate pieces of webbing, instead of needing two long pieces of webbing capable of spanning the whole gap. Doesn’t splicing a continuous loop through your webbing negate the adjustability of your split rig? It would, if these splices were permanent, but they aren’t.
Grog splices are semi-permanent, but not permanent. They can be left in place for a long time, but easily removed and reused at will. It takes me roughly five minutes to connect two highline segments with grogs, and about a minute to take them apart after they’ve been tensioned. I’ve done this at home and right at the anchor, which shows that field splicing with grogs is doable for someone who is used to making them.
Also, if you own a long rig, it is easy to pre-splice your segments in a smart way to give you optimal flexibility across different webbing lengths. For example, if you own six 50m highline segments, you can connect three 50m segments in one bag, two 50m segments in another bag, and leave the final 50m segment in its own bag. For any line up to 150m, you have a bag already packed with no need to make any connections. From 150-250m, you have to combine 2 bags with one split either at home or on site. For lines from 250-300m, you have to make 2 connections at home or on site. In all of these cases you have full flexibility, with minimal need to make connections for a specific rig. You also maintain the safety benefits of a split rig in every case, without having the hassle of making up to 5 connections while packing for a rig.
# Continuous Loops in Dyneema
Why use a grog instead of another method of making a continuous loop? You can read all about some different ways of making continuous loops at the sailing website L-36, but even this isn’t an exhaustive source. Like soft shackles, there are many ways of accomplishing the same thing with different strengths and trade offs. The primary reason for choosing a grog for split connections is having a secure splice (thanks to the brummel) without having to lock stitch. Lock stitching is relatively more difficult and time consuming than splicing, and slackliners might either be put off by the annoyance or be tempted to skip the lock stitch (risking full failure of the splice). Plus, lock stitching would require the loops to be more permanent than semi-permanent. I have not been able to find any information of the grog alternative mentioned at Animated Knots called the “Brion Toss re-braided Brummel technique,” so I can’t compare that here.
# Benefits of the Grog
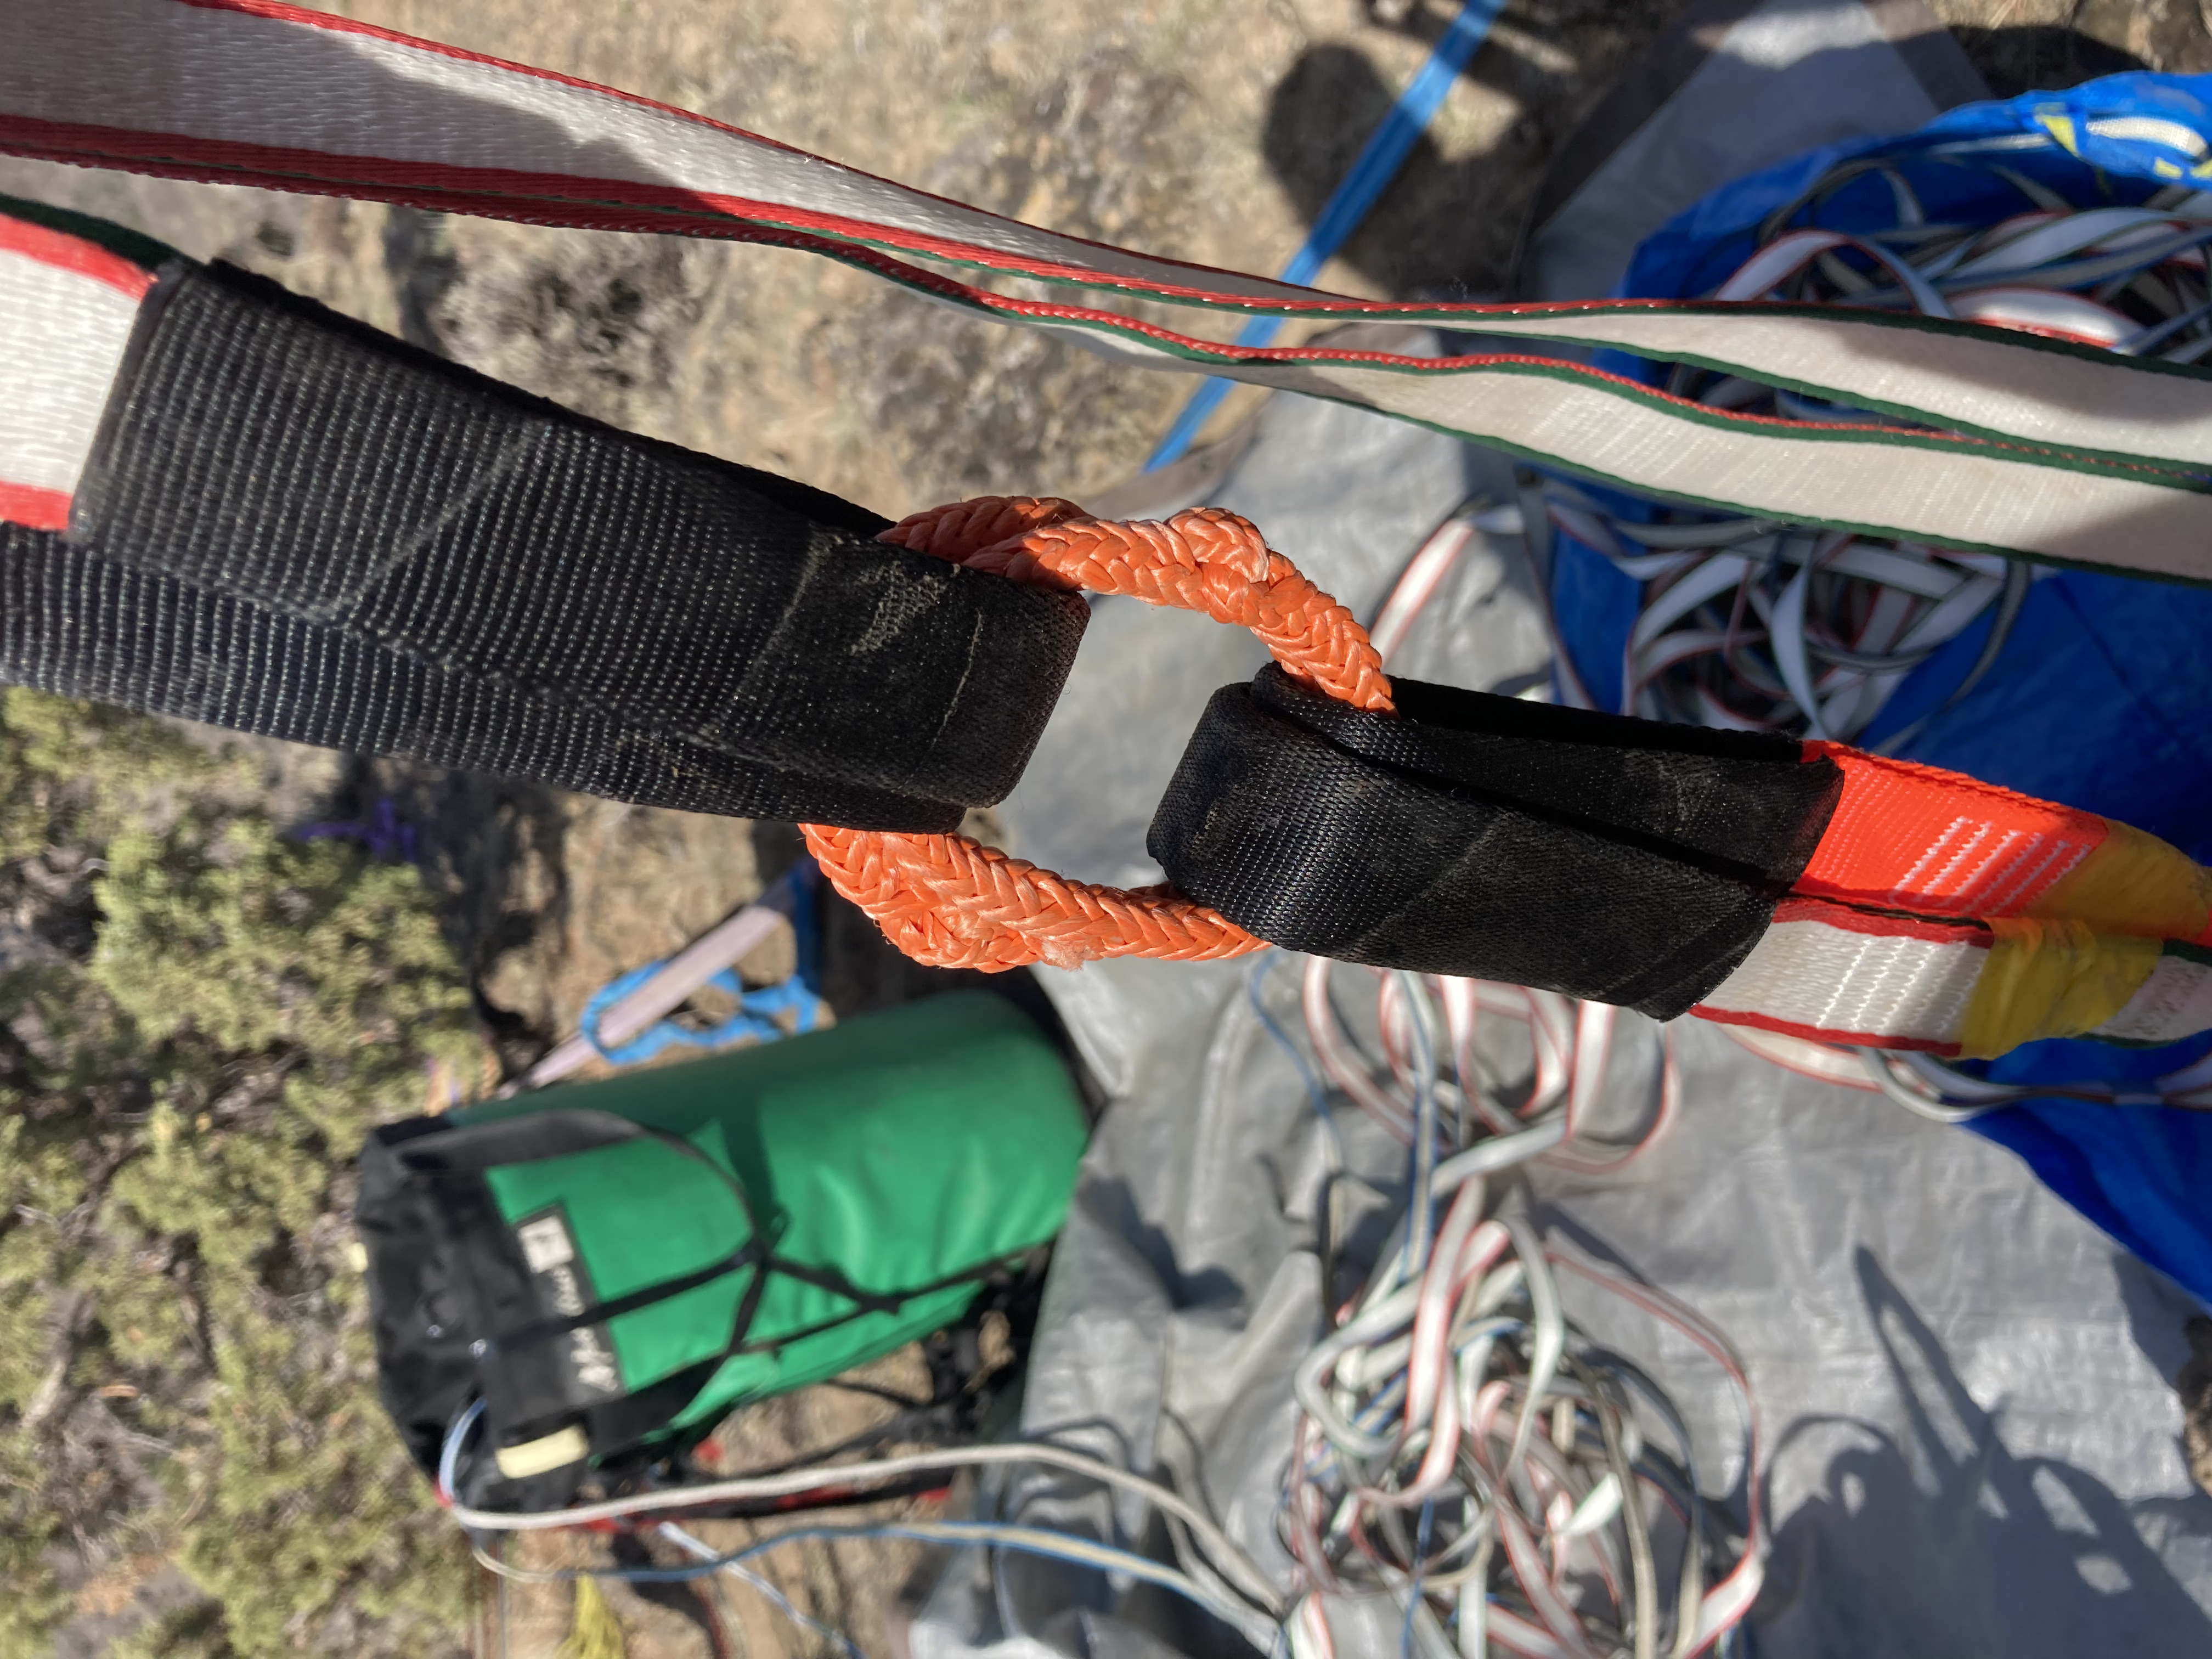
- Size: Grogs are small. Two 5mm grogs at a split is roughly the size of one 5mm soft shackle, without the button knot. This means they add minimal bulk, and are extremely easy for leash rings to pass.
- Weight: One 5mm grog splice with 4" buries weighs about 7.6g. A small 5mm soft shackle weights about 15.9g. An 8mm camp stainless steel quickink weights 76g. This means in addition to being about the size of one soft shackle without the button knot, two grogs also weigh less than one soft shackle. Two grogs also weigh one fifth of a single 8mm quicklink. While walking, this translates to less wobble and shake from the splits and a more continuous feel across the line. It is also less weight in the bag.
- Security: Because they are spliced shut, as long as the tails remain buried, grogs cannot open. Unlike soft shackles, they do not need to be taped shut. Unlike quicklinks, they do not need to be torqued with a wrench. Once spliced, they only need a simple visual inspection that the tails are buried before being sent out.
- No tape: Grogs do not need a noose or screw taped shut. They do not have button knots that need to be taped in place to keep from grabbing the leash ring. You may still want to tape your sewn loops or other parts of your split, but the connections themselves need no tape. This means less waste from connecting and disconnecting segments, and a connection that remains visually inspectable throughout the rig.
- Easy to walk over: Grogs are extremely easy to walk over. Their small size is part of this, but they also make a closed loop that is very stable. That means they won’t twist, and feel fine to step directly on. No more problems at the split ruining your flow.
# How to make a Grog
Below are written instructions on how to make a grog splice. Pictures of each step can be found at the animated knots page for the grog sling.
- Cut length of dyneema
- Proper lengths are given in the table below
- Simply cut ends at a 45 degree angle, no taper necessary
- Measure back from ends
- Measure back one bury length from each end
- Add a little padding to account for the size of the brummel (one side might need more padding than the other, try making a few and you’ll see what I mean here)
- Make a hole in each end of the dyneema at the distance you’ve marked (bury length + extra for brummel)
- Make brummel
- Make sure the holes you made in the last step split the dyneema evenly: there should be 6 strands of dyneema on each side of the hole
- Pass strand A through the hole in strand B, until the hole in strand A has gone through the hole in strand B
- Then pass strand B through the hole in strand A
- Pull the tail of both strands to cinch the brummel
- Bury the tails
- Make sure each tail has at least your bury length coming out of the brummel
- Bury each tail back in the same direction as it comes out of the brummel, beginning the bury as close to the brummel as possible
Lengths of dyneema needed for different bury lengths in 5mm grogs:
| Bury Size Inches | Inches of Dyneema Needed | Bury Size mm | mm of Dyneema Needed |
|---|---|---|---|
| 4" | 20 | 102 | 508 |
| 5" | 25 | 127 | 635 |
| 6" | 29 | 152 | 737 |
These lengths should leave approximately one inch between the buried tails. This makes it significantly easier to splice, especially in sewn loops, and also avoids making a much longer grog than necessary.
Bury length is key: Make sure your bury length is at least 4 inches when measured from the ends of the brummel. This is the minimum size needed to get reliable strength. Buries that are far too short (less than 3 inches) will slip out well before the brummel breaks, opening the sling.
Are tapered tails necessary?: No tapers necessary, grogs tend to break at the brummel, not at the end of the buries. When they do break at the end of the buries, it’s not any weaker than other tests, so adding tapers wouldn’t add to their strength. Just cut your dyneema ends at a 45 degree angle.
# Breaktests
Disclaimer: the breaktests were performed at the Balance Community workshop using their breaktest machine, and with the assistance of Balance Community founder Jerry Miszewski. See the full breaktests at the complete breaktest page (some additional testing data is also included there). All tests were performed on Amsteel Blue.
# Determining MBS
To determine an MBS for the grogs, I’ve decided to run the MBS calculations on all of the tests with bury lengths 4" or greater. This includes 15 break tests. I’ve excluded the used grogs, as well as one test where a 5" bury grog got caught in the screw of the shackle pin and tore apart at 27.2 kN.
This gives us a three sigma MBS of 24.5 kN. For those who don’t know, the three sigma MBS is calculated by subtracting three standard deviations of the data from the mean, and in theory represents the value that ~99.7% of all samples will break at or above. This is the strict standard that climbing and slackline gear is typically held to.
It is important to note the mean across the 15 samples is quite higher than the three sigma MBS at 31.0 kN. The reason the MBS is so low is because of the high variance in the data. The weakest grog in the sample set was 27.3 kN, the strongest was 35.9 kN (both had 4" buries). This relatively large difference between weakest and strongest means a large standard deviation, and thus a more conservative three sigma MBS in relation to the mean.
| Bury Size (in) | Three Sigma MBS (kN) | Mean Breaking Strength (kN) | Minimum Tested Value (kN) | |
|---|---|---|---|---|
| 4 - 6 | 24.5 | 31.0 | 27.3 |
# Are Longer Buries Better?
I advocate that 4 inches if the minimum bury length for a 5mm grog splice. But is going longer better? As mentioned above, 4" grogs had the weakest test of all the 4", 5", and 6" buries we tested at 27.3 kN. But they also had the strongest at 35.9 kN. We tested 6 4" grogs, 2 5" grogs (if you exclude the one that got caught in the shackle pin), and 3 6" grogs. Due to the very high value of 35.9 kN, I believe the higher variance in 4" grogs is simply an artifact of testing twice as many. More testing would be needed to confirm or deny that, though.
Below are the values for just 6" grogs, for people who would rather use a longer bury. Note that the mean breaking strength is the same, but the three sigma MBS and lowest tested value are much higher.
| Bury Size (in) | Three Sigma MBS (kN) | Mean Breaking Strength (kN) | Minimum Tested Value (kN) |
|---|---|---|---|
| 6 | 29.9 | 31.0 | 30.6 |
# Smaller Bury Grogs
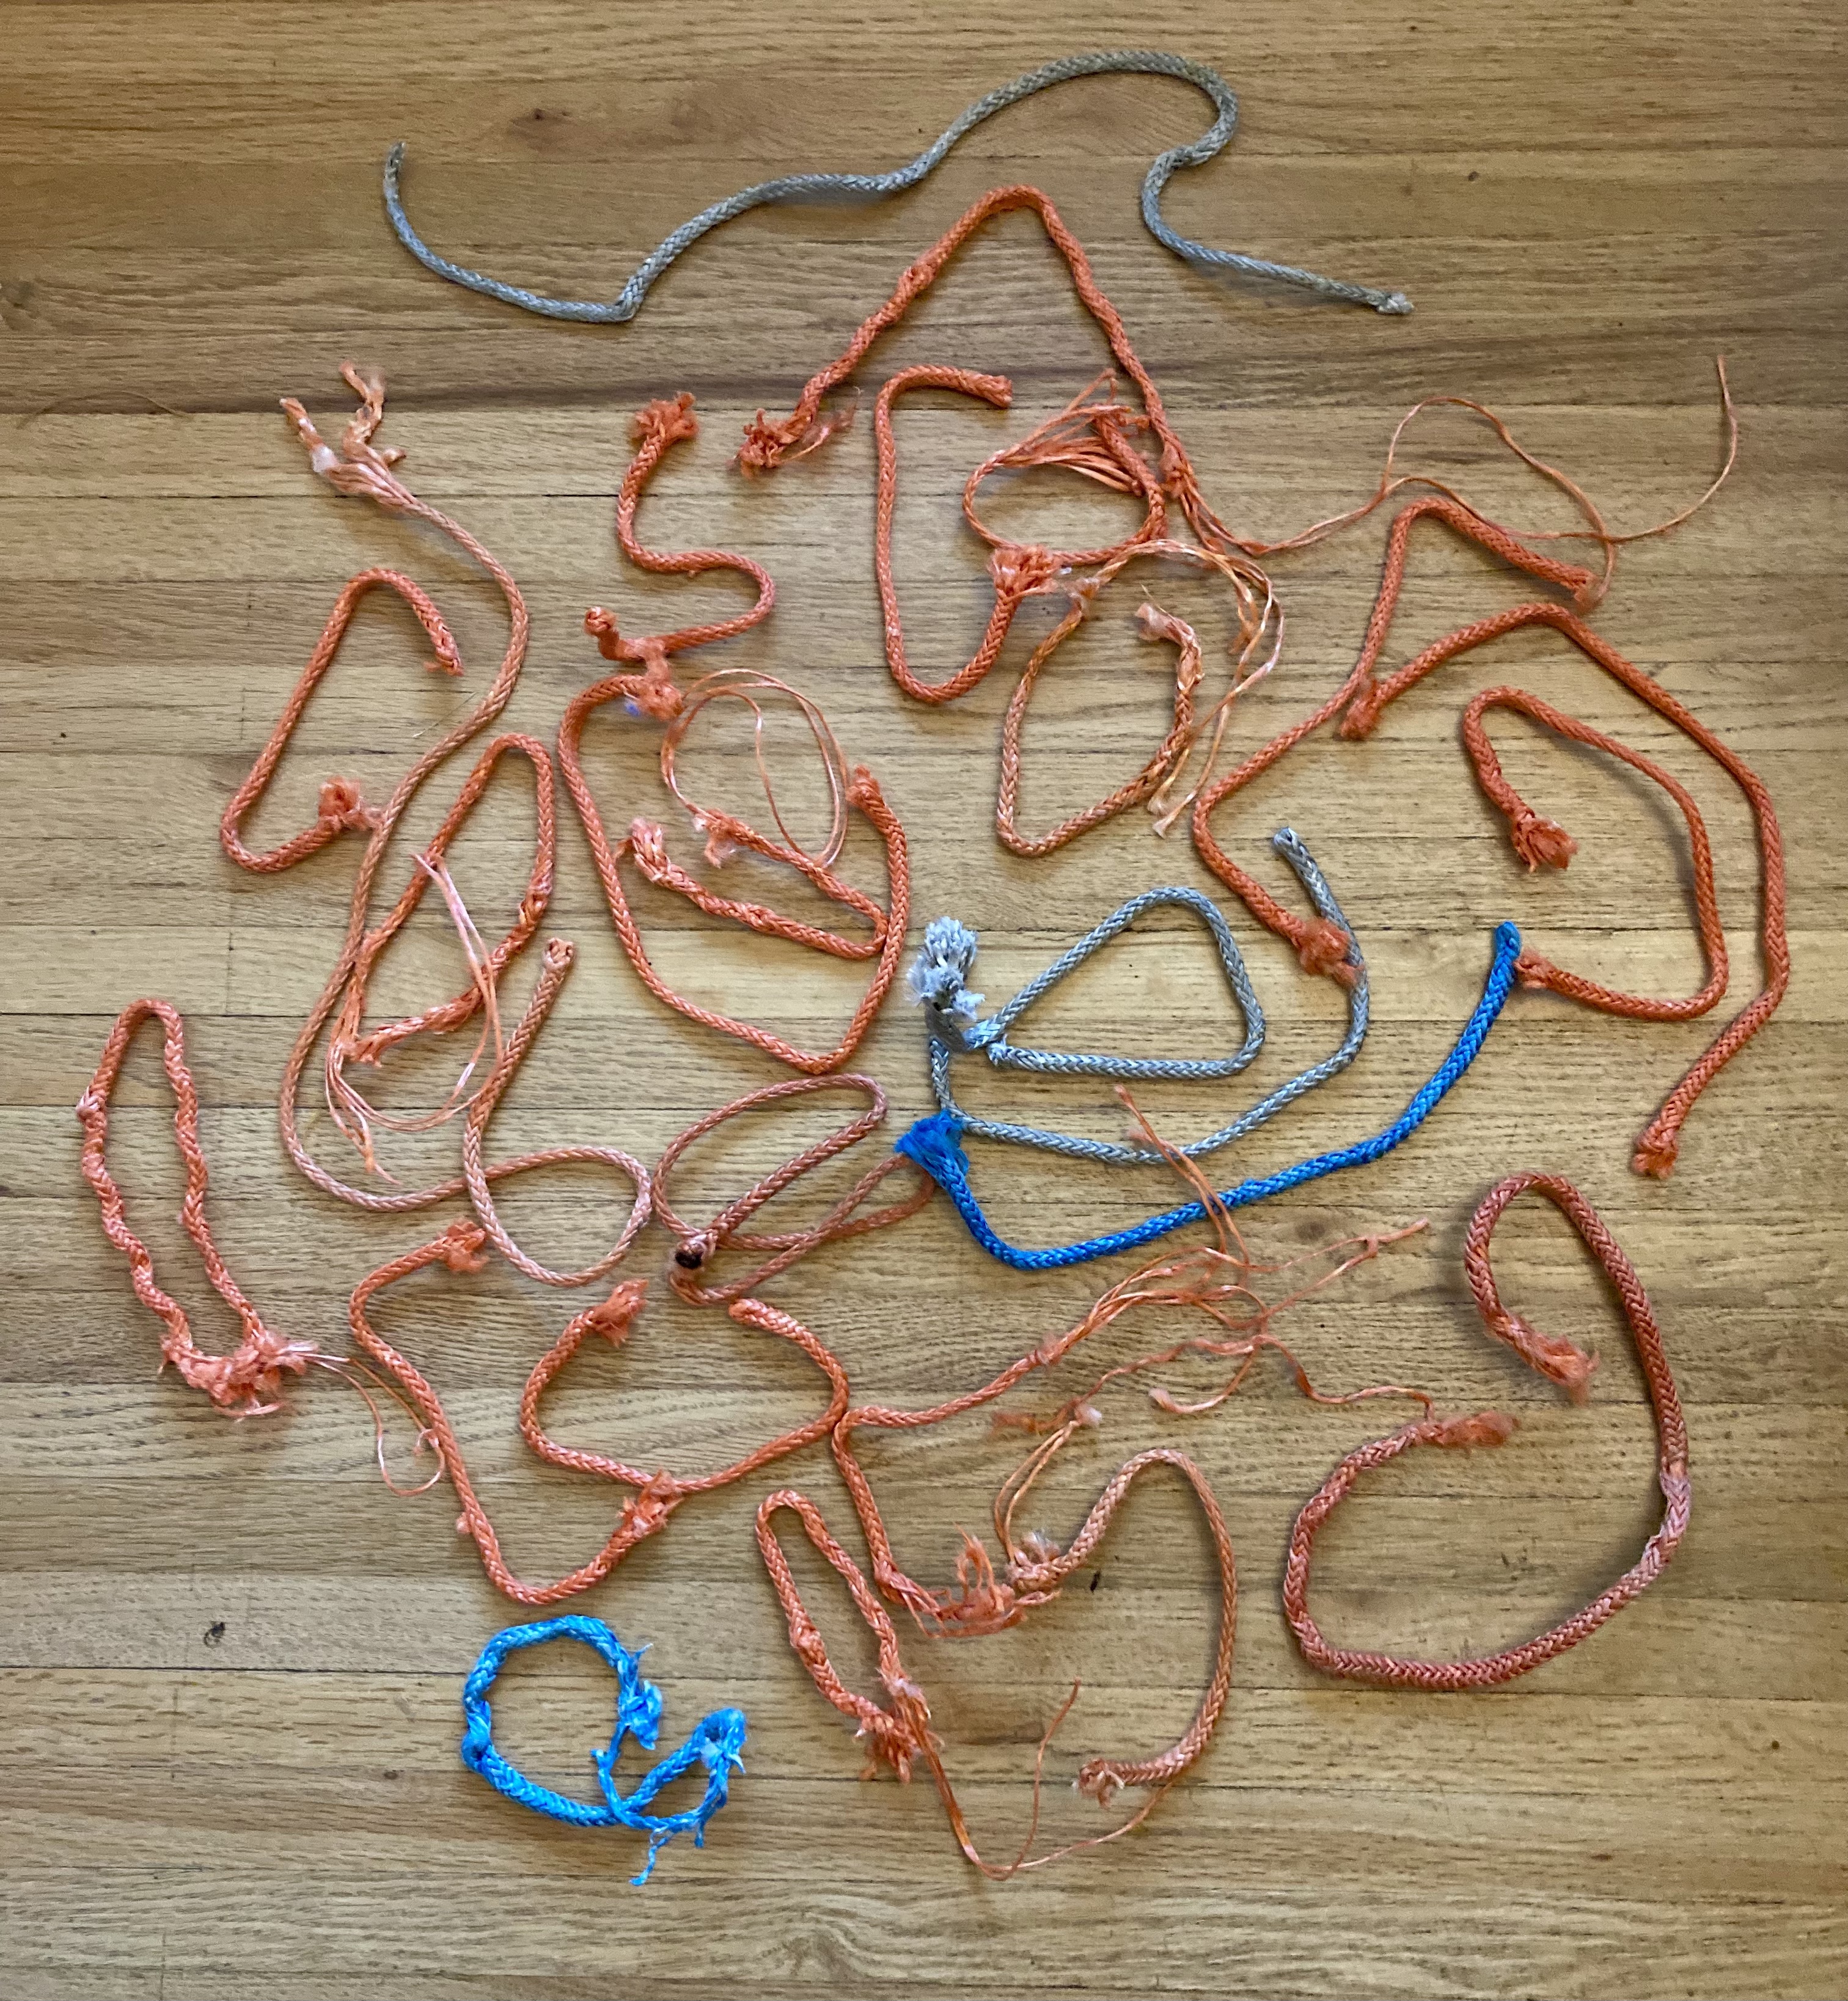
To show that 4" in the minimum bury length, here is the testing we did with smaller bury length grogs. The one 2" bury grog we tested came undone at 21.4 kN. The tails slipped out of their buries and the brummel rolled open, so the loop came undone before the dyneema broke. This is the only test where this happened, and we didn’t see a need to test more 2" buries.
The 3" buries all broke in the dyneema, but at notably lower values. Using 4" buries gives higher strength, and helps ensure that slight errors in splicing don’t lead to the loop coming undone.
| Bury Size (in) | Three Sigma MBS (kN) | Mean Breaking Strength (kN) | Minimum Tested Value (kN) |
|---|---|---|---|
| 3 | 22.0 | 26.7 | 25.5 |
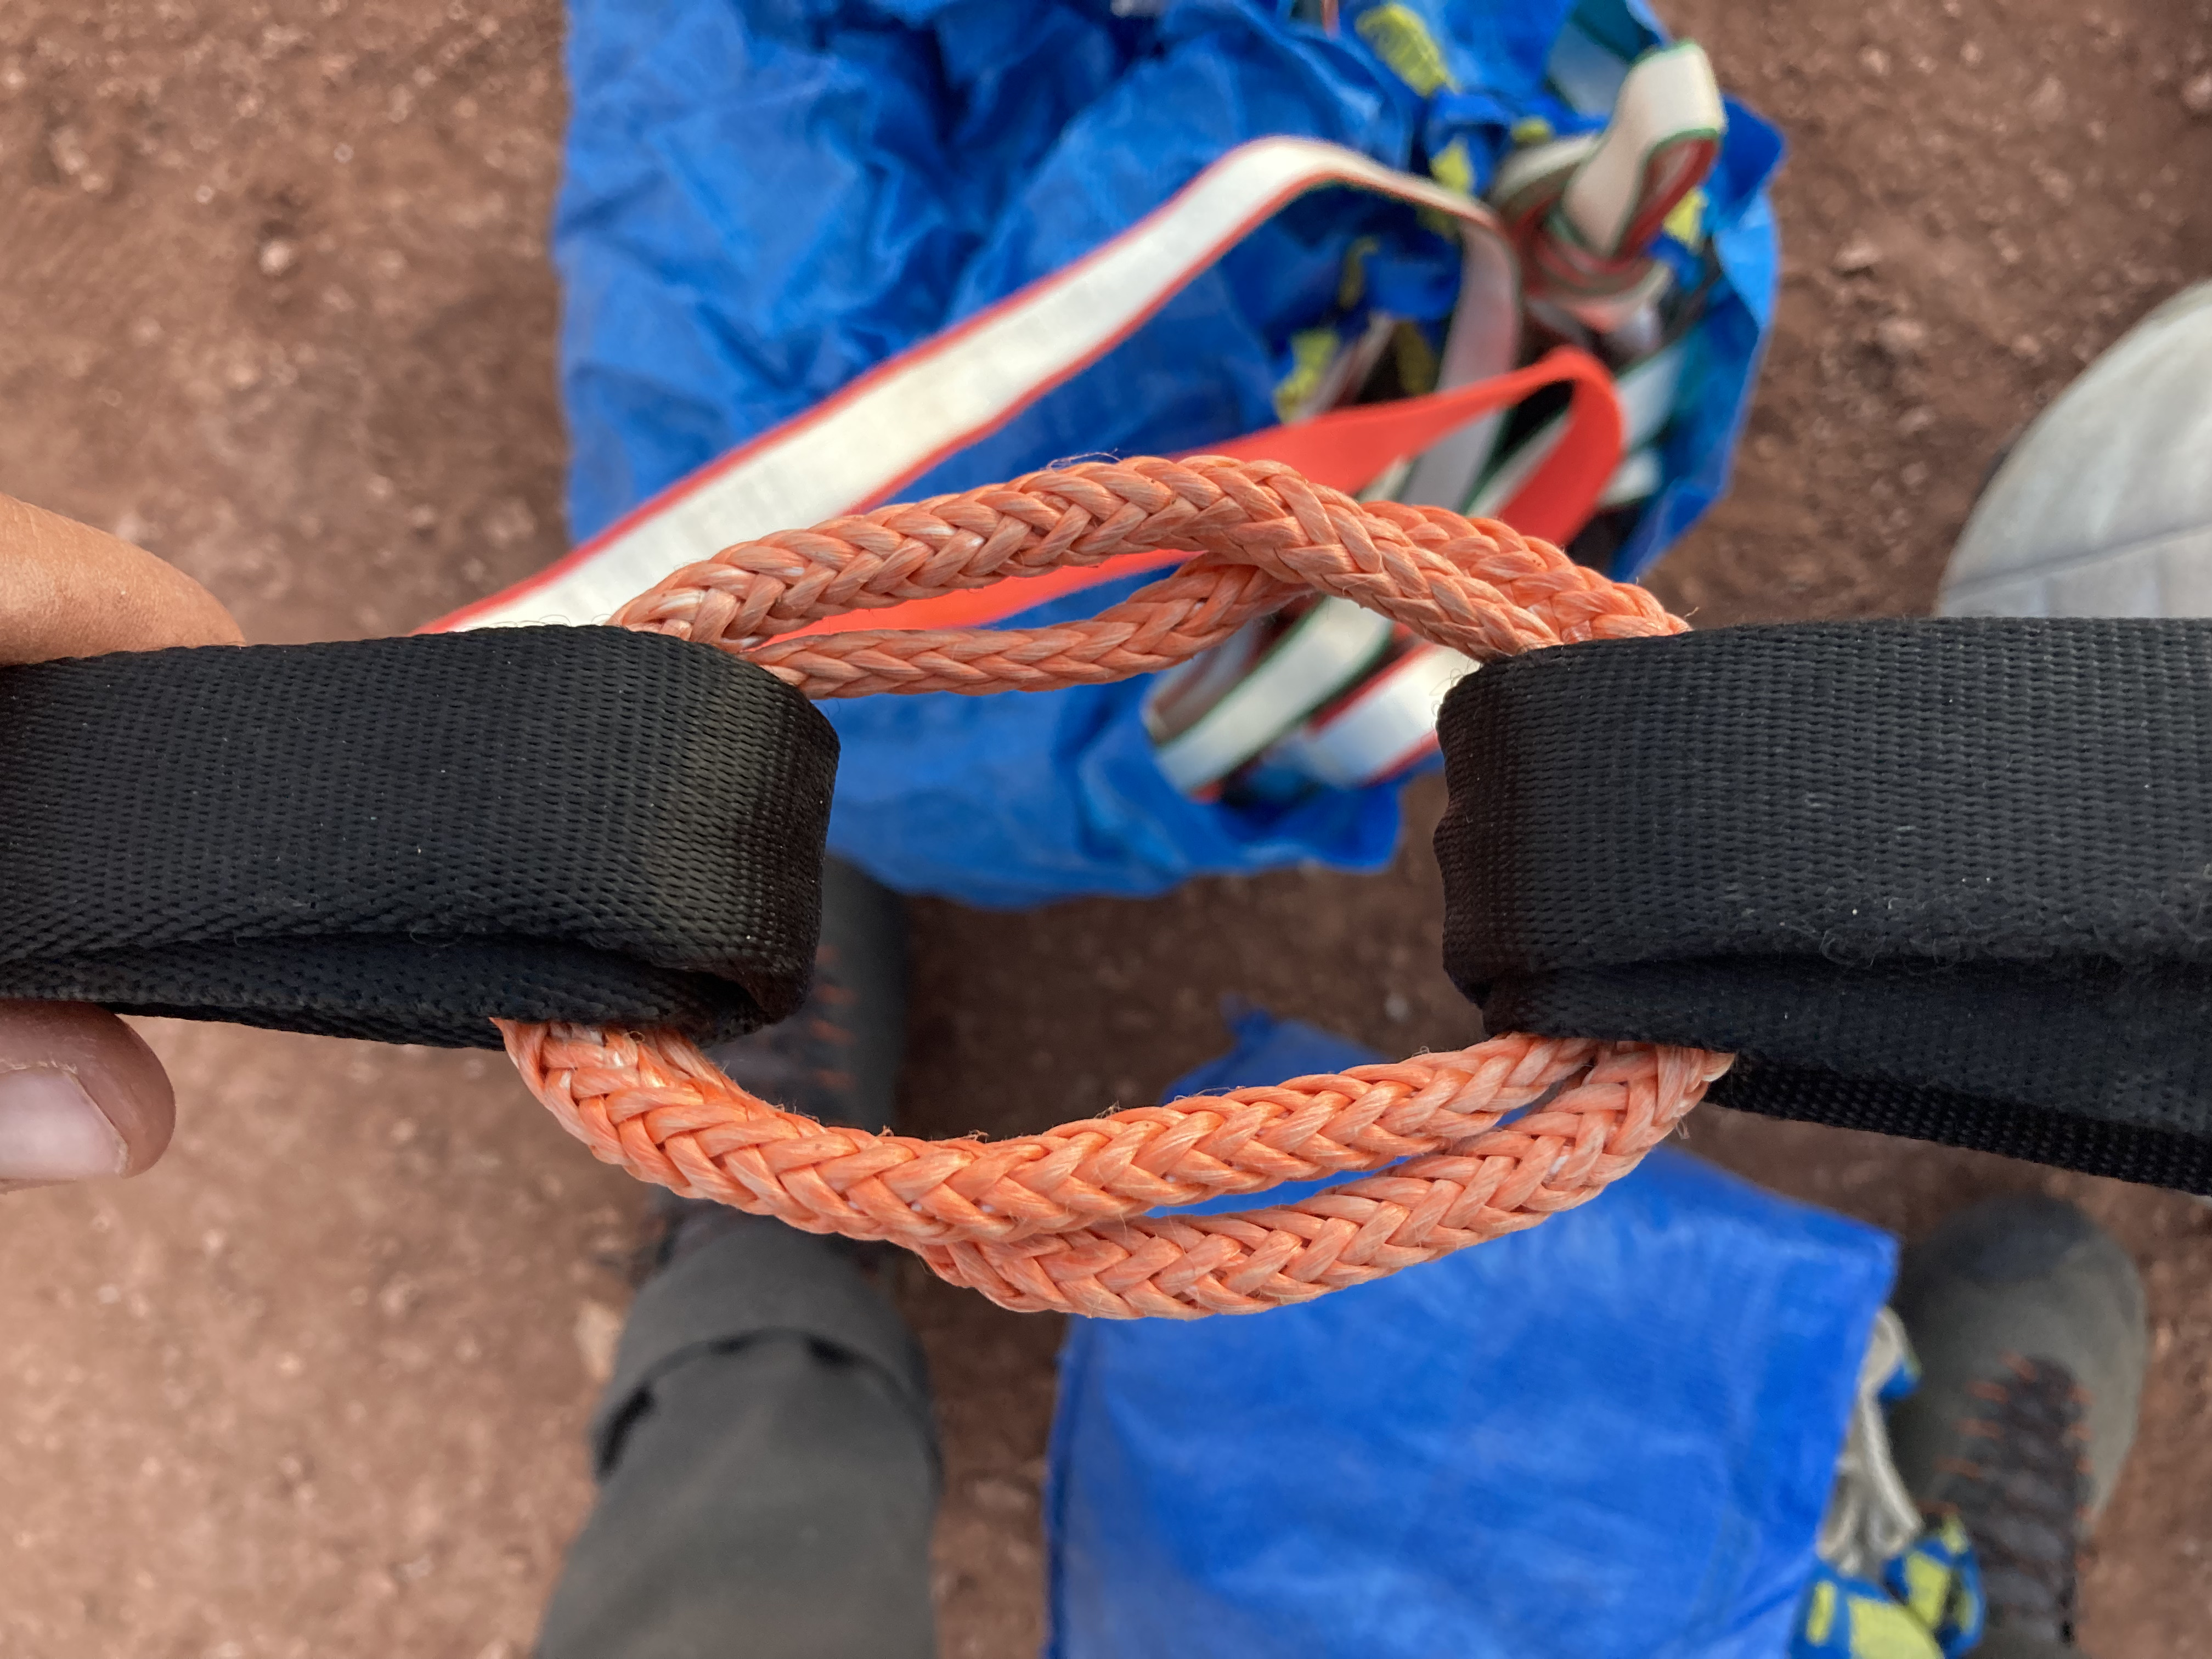
# Grog Inside or Outside?
Grogs can be installed one of two ways: with the brummel splice facing either inside, towards the center of the loop, or outside, away from the center of the loop. Grogs are made in the “outside” configuration, and can simply be rolled half a rotation to be used in the “inside” configuration. We tested 3 4" grogs in both configurations, both for completeness, and because it was suggested (by Jake Monaghan) that the buries may be less likely to work their way out when configured inside. Practical testing hasn’t showed any problem with buries working their way out, even on a permarig left for 8 months (one bury was lock stitched but the other was not - neither showed any signs of movement), so security of the buried tails doesn’t seem to be an issue.
| Bury Size (in) | Grog Inside or Outside | Mean Breaking Strength (kN) | Minimum Tested Value (kN) |
|---|---|---|---|
| 4 | Outside | 31.6 | 27.3 |
| 4 | Inside | 30.6 | 29.0 |
Having the grog outside had a higher mean but also a much higher variance (both the high and low were in this set), so a three sigma calculation would be much lower for this set. Having the grog inside had a lower mean but much lower variance. My interpretation of this is that there is no significant difference between the two ways of orienting the grog.
# Used Grogs
We also tested a few used grogs. We tested one each of a 3" and 4" bury that I used at a few festivals and a few other rigs. These were noticeably worn, and had been spliced and unspliced a number of times. We also tested two 6" bury grogs that had been left on Jerry’s 200m permarig for 8 months in Colorado at about 7000’ elevation.
The one 3" bury tested fairly low at 20.8 kN. The 4" bury used in the same split broke at 27.8 kN, which is within the normal range for new 4" buries. The two 6" buries broke at 26.4 and 34.2 kN, which is again a high variance, but shows that grogs handle UV well and maintain their safety when left up for 8 months or less. The 6" buries had been respliced only once to redo them for testing.
| Bury Size (in) | Mean Breaking Strength (kN) | Minimum Tested Value (kN) | |
|---|---|---|---|
| 3-6 | 27.3 | 20.8 |
# Further testing
Some more testing data is shown on the complete breaktest page. Due to the high variances of grogs, more testing would be beneficial to understand the range of values we could expect. It would also be beneficial to test how much grogs weaken sewn loops compared to soft shackles and quicklinks. For now, it is probably best to continue using soft thimbles with grogs as you would with soft shackles.
Further testing is also needed with both larger and smaller diameter dyneema. 6mm grogs could be a great way of adding strength without a significant bulk increase for people who desire more strength from each individual sling. But the bury lengths for these tests do not apply, and similar tests will have to be repeated to find the sufficient bury length for full strength 6mm grogs. Similarly, some people will want to try 4mm double wrapped grogs as they have 4mm double wrapped soft shackles. More testing is required to see how the splices react to being double wrapped, and how sewn loops respond when loaded with such small diameters. In general, choice of diameter in grogs is more flexible than in soft shackles, since there is no button knot to add or subtract bulk. However, bury lengths and strengths will need to be determined for whatever diameter is being used - so far only 5mm grogs can be advocated for.
# How and Where to Use Grogs
Knowing their benefits and their breaking strength, how and where should you use grogs in your split connections? While an individual 5mm grog is significantly weaker than either a 5mm soft shackle or 8mm quicklink, two 5mm grogs are roughly the same strength as both while also being smaller and lighter. Therefore, my guideline would be replace any single soft shackle or quicklink with two grogs. For example, on a Y2K or Dura-La-Vida style connection where offset loops are generally connected with 1 quicklink or soft shackle each, use two grogs in place of each single connector. By using grogs in these cases, you gain a significant increase in redundancy while maintaining strength, and decreasing size and weight.
However, there are also places where we use two connectors for redundancy, even though the strength of one connector is plenty. An example of this is when we put two soft shackles through both main and backup loops, with the backup loops tucked inside the main loops (through-all-four style connection). Here, two grogs sharing load should be roughly 50 kN strong, which is stronger than almost any webbing. And because there are two separate grogs, they are still redundant. For this reason, you can replace two soft shackles that connect the same pieces of webbing with two grogs. This gives you a connection that is plenty strong enough, and half the size and weight.
In general, any split connection can be done with two grogs, as long as there is not a failure mode of the webbing where one grog will be loaded on its own.
# Conclusion
Grog splices offer significant advantages over other connectors used in split highlines. They are smaller, lighter, and are significantly better to walk on and past than other connectors. When used in pairs, they maintain all of these advantages while also matching strength and adding redundancy. They are easily adapted to the most common split styles (4 simple loops, Y2K, and DLV) and can offer some advantage over the current standard in every case. They are relatively quick to install (about 5 minutes to splice two grogs) either at home or in the field, and are even quicker to remove (about 1 minute to remove two loaded grogs). If you’re not convinced, try walking a line with them.
I’ve tried to make this an exhaustive list of everything we know about grogs, but if you have additional questions reach out and I will try to answer them.
# Grog Links
Below is a list of the other articles I’ve made regarding grogs, that I will try to keep updated as I go.
# Edits
I will be trying to keep this page up to date with feedback and new information, and will keep track of edits as I make them here.
- Specified “Amsteel Blue” as the dyneema typed used in breaktests (7/18/22).
- Added links section, including like to post on field splicing grogs (7/18/22).
- Updated timing information on field splicing based on time from explanation video (7/28/22).
# Disclaimer
While I have done significant testing of grog splices, and have used them on numerous high traffic rigs to test them personally, I cannot guarantee the grogs you may use on your line, especially if only instructed from the internet. Use grogs at your own risk, and only if you feel comfortable with the information presented here.